

Hand Tied Hunting Gear Reliability: What Actually Holds Up
Hand tied hunting gear reliability comes down to materials, knot security, and inspection. Learn what holds up in the field and how to spot wear early.

In this article
Table of Contents
- What Hand Tied Hunting Gear Reliability Really Means
- Durable Hunting Gear Materials: Natural vs Synthetic Fibers
- Hand Tied vs Machine-Made: A Failure Analysis
- How to Inspect Hunting Gear for Wear Before Every Trip
- Custom vs Factory Hunting Accessories: What You Actually Pay For
- Stress Testing and Load-Bearing: How to Test Your Own Gear
- Field Maintenance and Repair for Hand Tied Gear
- Frequently Asked Questions
Last Updated: September 28, 2026
What Hand Tied Hunting Gear Reliability Really Means
Hand tied hunting gear reliability is the measurable ability of a hand-tied component to hold its rated load through repeated field cycles without slipping, stretching, or failing at the knot. It comes down to three variables: knot security, material behavior, and how the gear is loaded in real terrain. This guide from LDH Outdoors breaks down what actually holds up, what fails, and how to test your own setup before a season depends on it.
The stakes are higher than most hunters admit. The global hunting market is valued at $28.89 billion in 2026, with a projected 7.5% compound annual growth rate through 2035, according to Business Research Insights hunting market report.
Why Knot Security and Tensile Strength Matter More Than Marketing
Knot security is the single largest failure point in any hand-tied system. A knot that holds 90% of a cord's break strength is excellent; one that slips at 60% is a liability. Tensile strength tells you what the cord can take. Knot efficiency tells you what's left after you tie it.
Durable Hunting Gear Materials: Natural vs Synthetic Fibers
Durable hunting gear materials split into two families, and each has a clear trade-off. Natural fibers like leather and canvas are noted for lasting significantly longer than modern synthetics in rugged terrain and thick brush, according to the HSC Foundation materials guidance. Synthetics win on weight and water resistance, but they degrade under UV exposure and abrasion. The reason comes down to how each family handles repeated stress, moisture, and sunlight, not just raw strength.
Long-Term Degradation: What Actually Happens Over Seasons
- UV exposure. Synthetics lose tensile strength under sustained sunlight; nylon and polyester both degrade, with polyester generally holding up better. Natural fibers fade and dry out but don't lose strength the same way. Gear stored in a truck bed or hung on a sunny wall ages faster than gear kept in a pack.
- Moisture cycling. Nylon's wet-strength loss is real and repeatable. Leather and canvas can rot if stored wet, but a dried-out leather strap often returns to near full strength. Synthetics that stay wet for weeks can develop mildew and internal fiber damage you can't see.
- Abrasion. Natural fibers wear visibly and slowly. Synthetics glaze, the surface melts or polishes under friction, and glazed cord loses knot friction, which means your knot efficiency drops even though the cord looks fine.
- Fatigue at knots. Every knot is a tight bend. High-modulus synthetics fatigue fastest there; natural fibers and standard nylon tolerate repeated bending better.
A practical rule most experienced hunters land on: use natural fibers or standard nylon where the gear is inspected often and repaired in the field, and reserve high-modulus synthetics for applications where weight is critical and the knot is protected from abrasion and UV. The fiber that lasts longest isn't the strongest one, it's the one whose failure mode you can see coming.
Hand Tied vs Machine-Made: A Failure Analysis
Machine-manufactured gear fails in predictable ways: uniform stitching that hides stress points, and no ability to inspect internal construction. Hand-tied gear fails at the knot, which is at least visible and testable. That's the core trade-off.
Where Machine-Built Gear Fails in the Backcountry
Factory gear fails most often at seams and molded joints, where stress concentrates invisibly. Hand-tied gear concentrates stress at the knot, where you can see it coming. Neither is failure-proof. The difference is whether you get a warning.
How to Inspect Hunting Gear for Wear Before Every Trip
Inspection takes five minutes and prevents most field failures. Run this checklist before every trip:
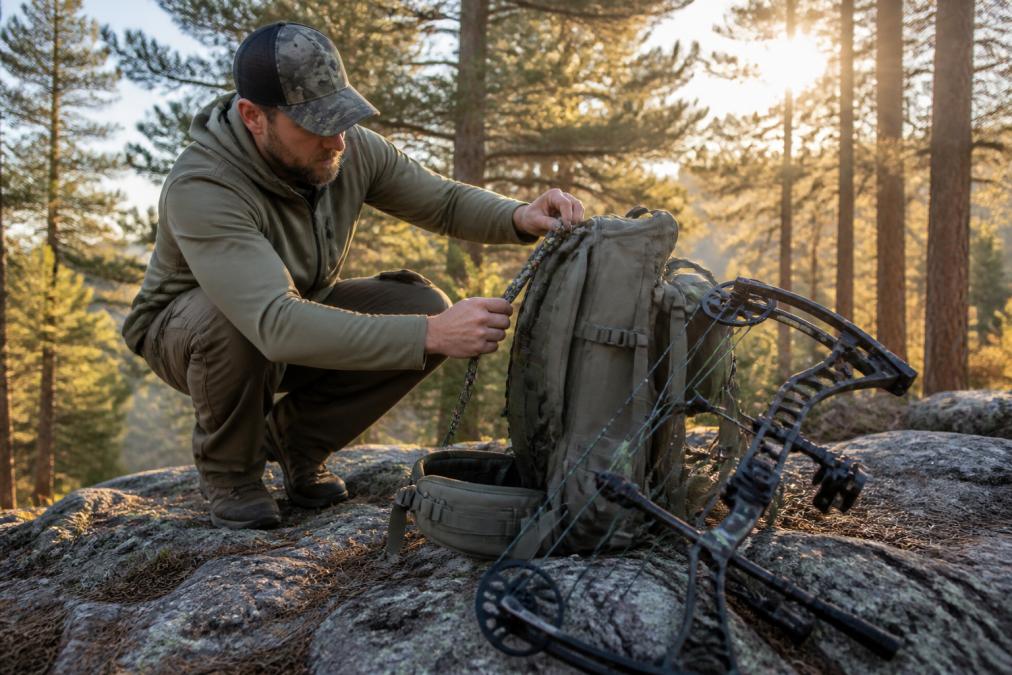
- Check knot security by flexing each knot and looking for slippage or fraying
- Run cord through your fingers to feel for flat spots, glazing, or stiffness
- Inspect attachment points for abrasion against hardware
- Test load-bearing by hanging your full pack weight and watching for stretch
- Look for UV discoloration on synthetic fibers
- Verify hardware configuration: buckles, clips, and webbing are seated correctly
Custom vs Factory Hunting Accessories: What You Actually Pay For
Custom vs factory hunting accessories comes down to what you're optimizing for. Factory gear gives you consistency and a warranty. Custom, hand-tied gear gives you repairability, transparency, and a fit built around your actual setup.
| Factor | Hand-Tied Custom | Factory-Made |
|---|---|---|
| Failure point | Visible knot | Hidden seams |
| Repairable in field | Yes | Rarely |
| Weight | Minimalist profile | Often heavier |
| Fit to your setup | Custom-tied | Fixed sizing |
Stress Testing and Load-Bearing: How to Test Your Own Gear
Stress testing your own gear is straightforward and doesn't require lab equipment, but it does require a repeatable protocol. The goal isn't to break gear, it's to find where your setup fails before the field does, and to compare one setup against another on equal terms. Most gear guides skip this entirely, which is why so many hunters discover a weak knot at the worst possible moment.
A Standardized DIY Stress-Test Protocol
Use the same steps every time so results are comparable across gear and across seasons.
- Establish a baseline load. Weigh your loaded pack and bow together on a luggage scale. Record the number. This is your 1.0x working load.
- Rig a fixed anchor. Use a sturdy branch, beam, or rated anchor point at roughly chest height, never at head height.
- Mark the start position. Tie a small reference knot or wrap tape at the anchor so you can see any creep or slippage.
- Apply the working load and hold. Hang the full 1.0x load for 30 minutes. Measure any stretch or knot movement against your reference mark.
- Step up to 1.5x. Add weight to reach 1.5x your working load. Hold for another 30 minutes. This is your safety margin test.
- Inspect under load, then unload and inspect again. Look for knot creep, glazing, fraying, and hardware deformation, both while loaded and after.
- Log the result. Note the date, load, hold time, and any movement. A log turns a one-time test into a reliability record.
What to Measure (and Why It Matters)
Three measurements separate a real test from a guess:
- Knot creep. The distance a knot migrates under load. Zero creep at 1.5x is the target. Any measurable creep means the knot pattern or cord is wrong for the load.
- Elastic stretch. How far the cord elongates and whether it returns. Nylon stretches and recovers; Dyneema barely stretches but can slip at the knot instead. Both are acceptable if the knot holds.
- Permanent deformation. After unloading, does the cord or hardware return to its original shape? If not, the material has yielded and its rated capacity is no longer trustworthy.
Why This Protocol Beats Anecdotal Reviews
A properly tied, properly rated system shows minimal creep and no visible knot movement. Anything that slips under 1.5x load gets retired. That single rule, applied consistently, prevents more field failures than any gear upgrade.
Field Maintenance and Repair for Hand Tied Gear
Field repair of hand-tied gear is one of its biggest advantages. You can retie a failed knot with cold hands in under a minute if you know the pattern. Machine-sewn gear usually can't be fixed in the field at all.
Maintenance protocols that extend gear longevity:
- Retie knots at the start of every season, even if they look fine
- Store gear dry and out of direct sunlight to slow material fatigue
- Keep a spare length of cord in your pack for emergency field repair
- Inspect after every trip, not just before
Frequently Asked Questions
Why is hand-tied gear considered more reliable for hunting?
Hand-tied gear lets a maker control knot security, tension, and material choice at every step, which reduces the weak points that cause equipment failure. Unlike mass-produced accessories, each piece can be adjusted for load-bearing and field performance. The result is a sling or accessory that holds up under stress testing and real terrain instead of failing mid-season.
What materials are best for hand-tied hunting equipment?
Durable hunting gear materials fall into two camps. Traditional natural fibers like leather and canvas last significantly longer than many modern synthetics in rugged terrain and thick brush. Synthetic fibers offer better abrasion resistance and shed water faster, but they degrade under UV exposure. The best hand-tied gear combines both: natural materials where wear is heaviest, synthetics where weight optimization and moisture management matter most. Match the material to your terrain, not the trend.
How does gear construction affect hunting performance in extreme weather?
Environmental exposure is the top cause of material fatigue in hunting gear. UV light breaks down synthetic fibers, freezing temperatures make some knots brittle, and repeated wet-dry cycles weaken natural materials. Hand-tied construction lets makers build in redundancy at stress points, which factory heat-sealed joints often lack. Inspect knots and stitching after every trip in harsh conditions.
How do you maintain hand-tied hunting slings and accessories?
Maintenance protocols for hand-tied gear are simple but non-negotiable. After each trip, wipe down hardware and inspect knots for slippage or fraying. Re-tension any knots that have loosened, and replace frayed cordage before it fails. Store gear dry and out of direct sunlight to slow UV degradation. Check attachment points on your backpack or bino-harness for wear and tear every few outings. A five-minute inspection prevents the mid-hunt failure that costs you an opportunity.


