

How to Organize a Hunting Backpack: 7 Steps for 2026
Learn how to organize a hunting backpack with a 7-step system for weight distribution, quick access, and a repeatable layout. Start packing smarter today.

In this article
Table of Contents
- What You'll Need Before You Start Packing
- Step 1: Build Your Hunting Backpack Essentials List
- Step 2: Match Pack Capacity to Your Hunt
- Step 3: How to Distribute Weight in a Hunting Backpack
- Step 4: Categorize Gear by Frequency of Use
- Step 5: The Best Way to Carry a Bow on a Backpack
- Step 6: Use Modular Storage and Internal Pouches
- Step 7: Maintain Your System and Keep Gear in the Same Place
- Frequently Asked Questions
Last Updated: September 25, 2026
What You'll Need Before You Start Packing
A hunting backpack is a load-bearing system, not a duffel bag with straps. When you know how to organize a hunting backpack, you stop digging for gear and start hunting harder. This guide from LDH Outdoors covers seven steps for day hunts and multi-day backcountry trips alike.
Most hunters pack by instinct, then spend twenty minutes at first light searching for a headlamp. That is a system failure, not bad luck.
Before you touch a single item, gather these:
- Your full gear loadout for the specific hunt
- A scale (a luggage scale works fine)
- Stuff sacks and dry bags in a few sizes
- A flat surface to lay everything out
Lay it all out first. You cannot organize what you cannot see.
Step 1: Build Your Hunting Backpack Essentials List
A hunting backpack essentials list is the foundation of every organized pack. It forces you to decide what goes in before you start stuffing pockets.
Start with three categories: survival, hunting, and comfort. Survival gear never leaves the pack. Hunting gear changes by season and species. Comfort items are the first to cut when weight matters.
Build your list in writing. A phone note works. The act of writing it down reveals duplicates and gaps you would miss otherwise.
The Non-Negotiables: Kill Kit, First Aid, and Hydration Bladder
Three items earn permanent spots in every pack: a kill kit, a first aid kit, and a hydration bladder.
Your kill kit handles field dressing: a sharp knife, gloves, game bags, and a way to tag your animal.
Step 2: Match Pack Capacity to Your Hunt
Pack capacity should match your hunt length and gear volume, not your ambition. A 20- to 30-liter day pack works for most single-day treks; overnight and backcountry hunts need 40 to 70 liters or more.
Here is how capacity breaks down by hunt type:
| Hunt Type | Typical Capacity | Key Gear Driving Volume |
|---|---|---|
| Day hunt, mild weather | 20-30 liters | Water, layers, kill kit, snacks |
| Day hunt, cold weather | 30-40 liters | Bulky insulation layers, extra fuel |
| Overnight backcountry | 40-55 liters | Sleep system, shelter, food |
| Multi-day backcountry | 55-70+ liters | Full camp, spare clothing, resupply |
Step 3: How to Distribute Weight in a Hunting Backpack
Weight distribution decides whether your pack feels like part of your body or a bag of rocks. The goal: keep the load's center of gravity close to your own, roughly at shoulder-blade height and centered left-to-right.
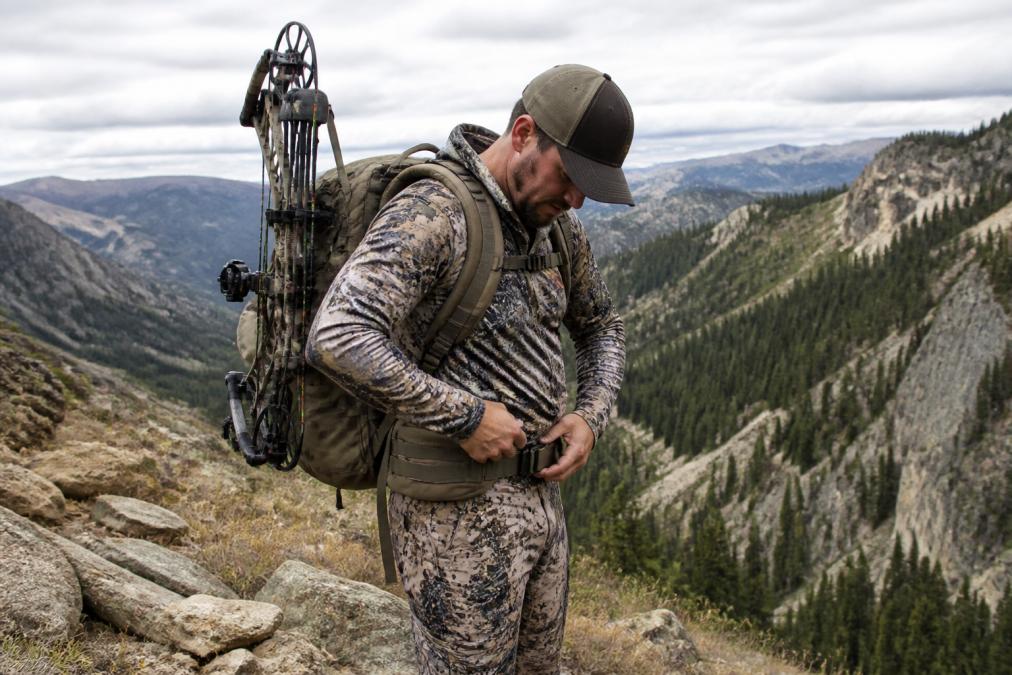
Pack in this order:
- Heaviest items against your back, at shoulder-blade height
- Medium-weight gear below and beside the heavy items
- Light, bulky items like sleeping bags at the bottom
- Items you need often in lid and hip-belt pockets
Center of Gravity, Load Lifters, and Your Waist Belt
Your center of gravity should sit near your natural hip line, not up at your shoulders. Load lifters and a properly fitted waist belt make that happen.
How to Check Your Center of Gravity Before You Hike
You can verify the load before you leave the truck. Stand sideways to a mirror or phone camera: the pack's bulk should sit between your shoulder blades and your hips, not above your shoulders or hanging off your lower back.
Why This Matters More Than the Pack You Buy
A mid-priced pack with a dialed-in center of gravity will out-carry an expensive pack loaded wrong. The pack is a frame; you are the suspension. Get the load geometry right before chasing a lighter bag.
Weigh your heaviest three items and note the numbers. Knowing your water, kill kit, and insulation weights lets you rebalance in seconds when you swap gear between seasons.
Step 4: Categorize Gear by Frequency of Use
Gear should be organized by how often you reach for it, not by what it is. This single rule eliminates most mid-hunt frustration.
Split your gear into three tiers:
- Constant access: Water, snacks, phone, tags, rangefinder
- Occasional access: Rain shell, extra layers, headlamp, calls
- Rare access: Kill kit, first aid, repair kit, spare batteries
Step 5: The Best Way to Carry a Bow on a Backpack
The best way to carry a bow on a backpack is hands-free, secure, and quick to release, especially when moving between glassing and stalking. Three common approaches:
- Bow sling attached to pack webbing: Keeps the bow tight against the pack and frees both hands.
- Bow hook or limb gripper: Fast to deploy, but can shift on rough terrain.
- Hand carry with a wrist sling: Best for ready-to-draw moments, worst for long hikes.
Step 6: Use Modular Storage and Internal Pouches
Modular storage turns a single big compartment into small, labeled zones using internal pouches and organizer panels. Use stuff sacks and dry bags to group gear by category:
- One dry bag for insulation layers
- One stuff sack for the sleep system
- One small pouch for electronics and batteries
- One pouch for the kill kit
Step 7: Maintain Your System and Keep Gear in the Same Place
The psychology of "Same Place Every Time" is the real secret to an organized pack. Your hands learn where things live, and that muscle memory works even in the dark.
The Post-Hunt Reset Routine
An organized pack stays organized because you reset it after every hunt. Run this sequence within a day or two of getting home, before gear scatters across the garage:
- Empty everything. Pull every pouch, bag, and loose item out onto a flat surface.
- Inspect as you go. Check for damage, wear, and anything you used and did not replace.
- Clean what got dirty. Wipe down the pack interior with a damp cloth. Brush dirt out of zipper teeth with a soft brush, grit is what kills zippers, not use.
- Dry anything wet. A damp sleeping bag or rain shell left in a stuff sack grows mildew fast. Hang it, then repack only when fully dry.
- Restock consumables. Batteries, first aid supplies, snacks, and water treatment are the items you burn through. Replace them now, not the night before your next hunt.
- Repack to the same layout. Same pouch, same pocket, same orientation. This is the step that builds the muscle memory.
Cleaning Modular Components
Modular systems, stuff sacks, dry bags, organizer panels, and pouch inserts, need their own care. Shake out debris, wipe the inside with mild soap and water, and air-dry fully before they go back in the pack. Do not machine-wash coated dry bags; heat and agitation break down the waterproof coating. A soft sponge and cool water is enough.
Seasonal Deep Clean
That consistency is what separates hunters who move fast from hunters who fumble. Same place, every time, and the same reset, every time you come home.
Frequently Asked Questions
How to set up a hunting backpack for quick access?
Keep your most-used items in quick-access pockets and swing-out pouches on your waist belt or lid. Your rangefinder, wind checker, and release should sit within reach without removing the pack. Your hunting backpack essentials list should drive placement: kill kit and first aid kit in an outer pocket, hydration bladder tube routed over your shoulder, and layers in the main compartment. Practice reaching for each item with the pack on before you hit the trail.
What is the best way to carry a bow on a backpack?
The best way to carry a bow on a backpack is with a dedicated sling that attaches to your existing pack webbing, keeping your hands free while you hike or glass. Look for a sling that secures the bow tight against the pack to prevent shifting in steep, brushy terrain. It should release quickly when you need to transition to a stalk, and it should work with your current backpack or bino harness without adding bulk.
How do you balance weight in a hunting backpack?
Place heavy items like your kill kit, water, and food close to your spine and centered between your shoulder blades. Lighter gear such as base layers, camo, and dry bags goes toward the bottom and outside. Use compression straps to keep the load from shifting, and tighten your waist belt so most of the weight rides on your hips. Load lifters should angle down slightly to pull the pack tight to your back.
What should I keep in a hunting backpack for a backcountry hunt?
A backcountry hunting backpack essentials list includes a kill kit, first aid kit, hydration bladder, emergency preparedness items, extra base layers, camo, dry bags, and a treestand harness if you plan to sit. Add a field dressing kit, headlamp, and enough food for the duration. Keep gear redundancy minimal to save weight, and store everything in modular storage or stuff sacks so you can find it in the dark.
Organizing a hunting backpack is a system, not a one-time task. The hunters who move fastest in the field are the ones who built that system at home and never break it. At LDH Outdoors, we build gear that fits into your system, not against it. Our Backpack Bow Sling is hand-tied in Oregon, attaches to most packs and compound bows, and gives you a secure, hands-free carry with quick release. Shop now and build a pack that works as hard as you do.


